Rachel White
Technologist, Artist, Pretend-Cyborg
Rachel White is a technologist, artist, and pretend-cyborg who is currently a Technical Evangelist at Datadog. Previously at American Express, Microsoft, IBM, and Adobe. She is interested in new uses for old hardware, useless robots, VR/AR/MR, and bots. She has spoken internationally about Node.js, JavaScript, Creative Coding, IoT, Artificial Intelligence, NodeBots, and hardware. She's a previous artist in residence at Pioneer Works where she worked on a series that visualized what modern cybernetic augmentation could look like with todays hardware and special effects makeup. Her other interests include glitch art, 80s horror, and indie games. Her aesthetic is fog machines, laser lights, and broken VHS tapes.
She’s always looking for new opportunities to connect with people in areas related to open source, developer outreach & education, and new innovations in art and tech. She loves talking to other developers about their own personal projects, and helping new speakers workshop talk ideas. Or maybe you just want to say hi! If so, contact her at loveless [at] gmail [dot] com
Part 1 - How to Build a Serverless Twitter Bot
serverlessnode.jsawsSo you want to build a Twitter bot? With serverless functions, it’s easier today than ever before—since you don’t need to worry about configuring daemons to constantly run your code or anything else server-side. Welcome to a two post series on building and monitoring a serverless application: in our case, a Twitter bot! In the first post we’ll be looking at AWS Lambda, S3 buckets, and CloudWatch to trigger our function to run. And in the second, we’ll cover setting up a AWS Integration with Datadog so that you can monitor your serverless function.
First let's talk about a brief history. Twitter bots used to be very popular around 2015, before Twitter made it so that you had to apply for a developer account to have access to their API. There are lots of different kinds of bots: some are generative image bots, while others are text based, either tweeting random words mashed together, or Markov chaining data from various corpora.
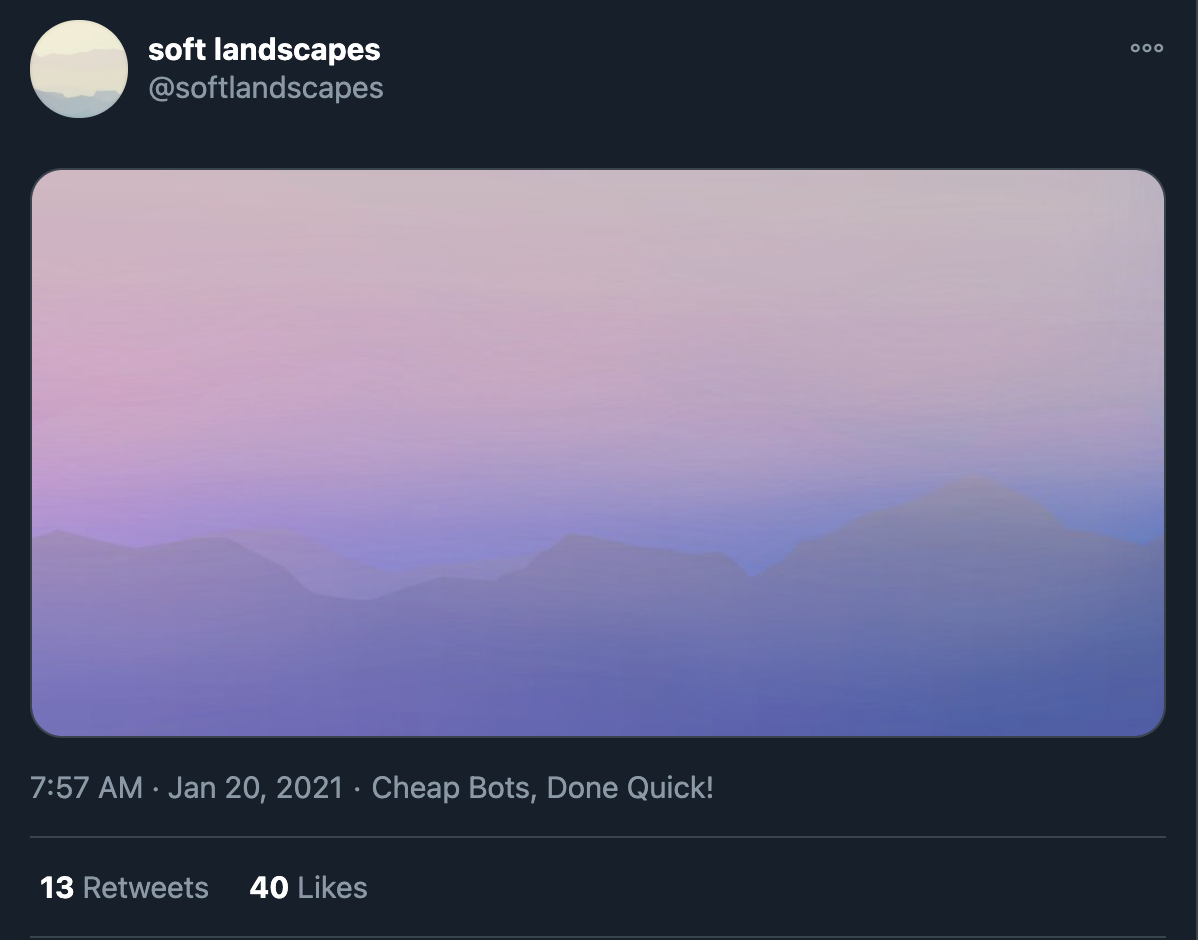
One great example is @softlandscapes, made by @v21. It uses a tool called Tracery, which generates language and text; bot developers realized they could use its structure to replace elements in SVG, which enables a lot of flexibility with creating generative images. You can see some other bots that are created with Tracery at Cheap Bots Done Quick.

Another great example is @BracketMemeBot, made by Darius Kazemi, who thankfully documents a lot of what he makes. Bracket Meme Bot takes random categories of items from Wikipedia that meet a certain set of guidelines (must have a plural noun in the title, and must have at least sixteen pages)Once it finds some categories that meet the requirements, it picks 16 of them at random and draws them on the bracket. It’s extremely silly, and you end up with brackets for things like ‘SpongeBob SquarePants video games’ and ‘Underground Laboratories’.
I picked one from Darius because he also keeps a GitHub repository of a lot of corpora that a ton of bot makers pull from. You can find at https://github.com/dariusk/corpora.
Now that you understand a bit about where we’re coming from, let’s get into the technical aspects.
Some prerequisites:
- Node installed
- Serverless Framework CLI installed: https://www.serverless.com/framework/docs/getting-started/
- AWS Credentials set up with Serverless Framework for easier deployment (see quick setup): https://www.serverless.com/framework/docs/providers/aws/guide/credentials/
- AWS Account
- Twitter Developer Account
The first thing we’re going to do is navigate to the folder we want to use for our code and run serverless create --template aws-nodejs
This is going to have the serverless framework set up a node template that’s already compatible with what AWS is looking for. We’ve got two files that are important: the handler.js where we write our bot code, and the serverless.yml file which is defining our provider, production environment, and other variables.
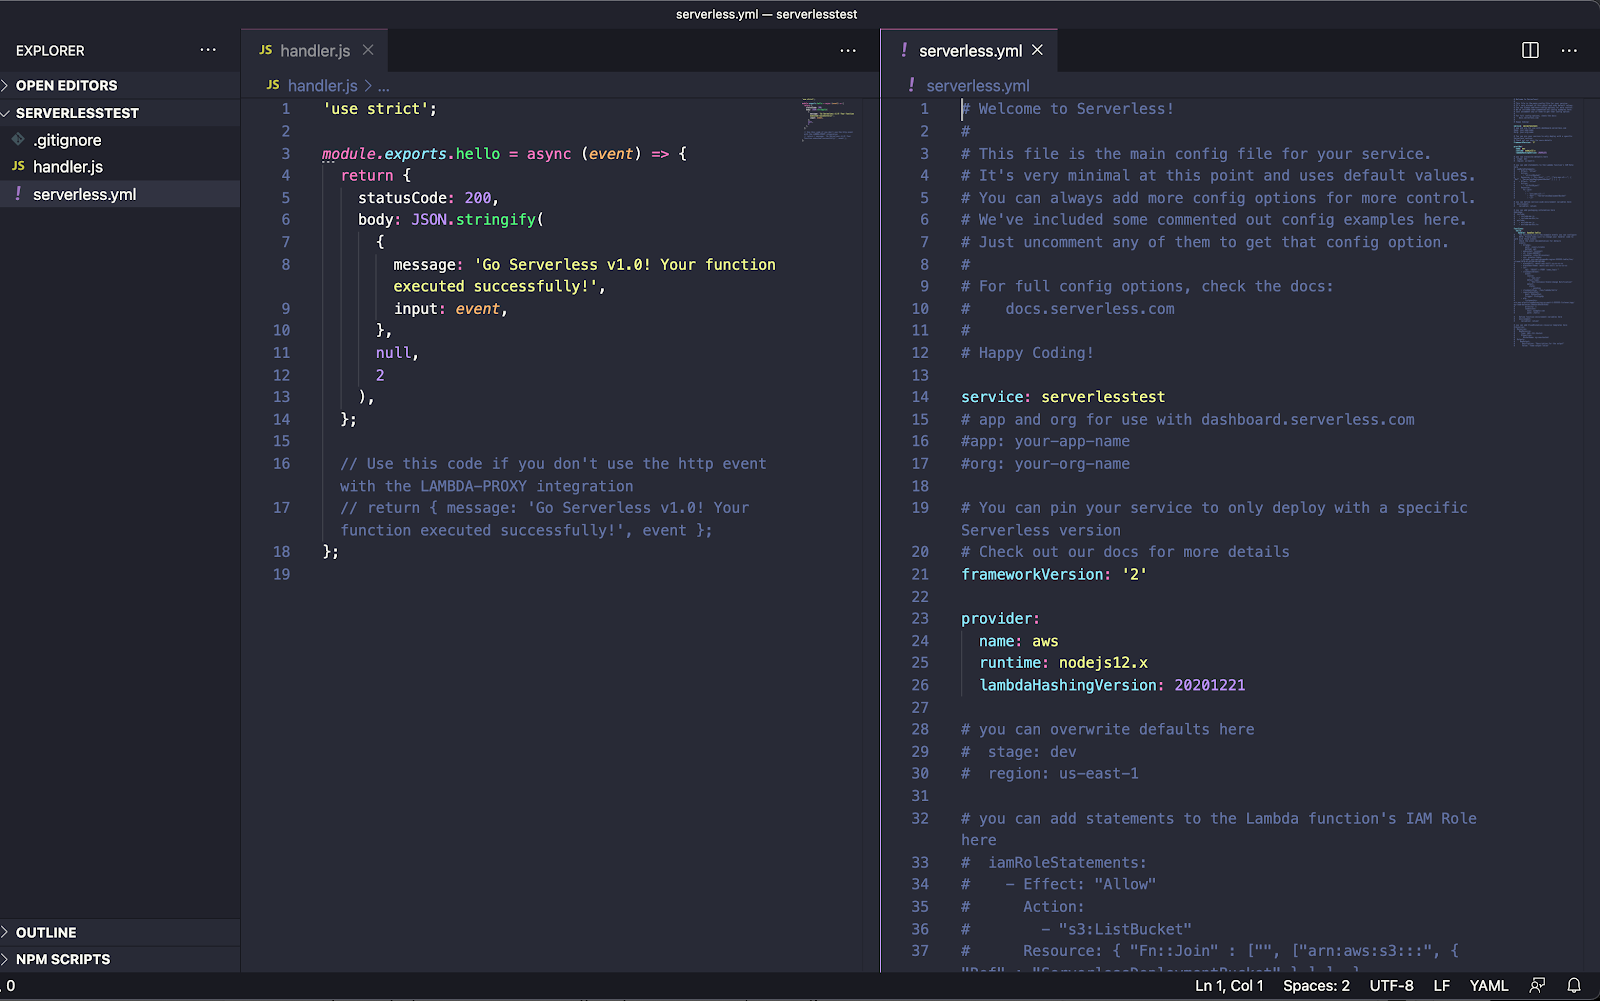
We’ve got to change the ‘service’ name in serverless.yml to something that is relevant to our application name.We can also change the name of the function and handler if you’d like.
Remember that if you change the function’s name in serverless.yml, you will need to make sure that it reflects the name in module.exports as well.
Now we can run sls deploy, which is short for serverless deploy. This will take our files, zip them up, and deploy them to AWS Lambda. Log into your AWS console and navigate to the Lambda Dashboard. Click on the service that has the name you chose in the previous step, so we can make sure everything is connected correctly.
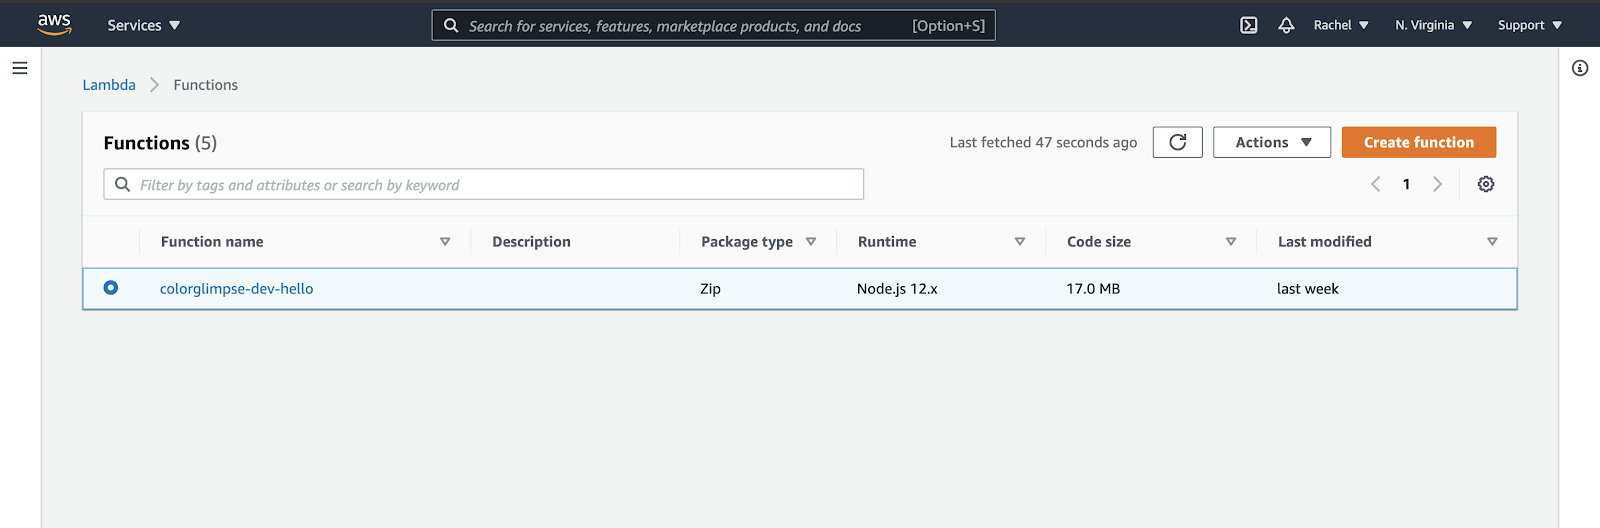
I can see my app showing up in the Lambda service dashboard once I hit sls deploy
Since everything is hooked up, now we can focus on coding our bot. For the sake of simplicity, I’m going to focus on just sending out a single tweet. We’re going to use a Twitter API client for Node.js called ‘Twit’. https://github.com/ttezel/twit
In the same directory you ran the serverless template command, type npm init so we can create our package.json file. You don’t need to change any of the values here. Next, we’re going to run npm install twit.
Now we need to change code in our handler.js file so that we are using the Twit library, and sending our messages out to Twitter.
Starting on line 2 of handler.js, we are going to add the following code, which accesses the Twit library and sets up our credentials. You can find the consumer_key, consumer_secret, access_token, and access_token_secret in the dashboard of your Twitter Developer account:
const Twit = require('twit')

const T = new Twit({
  consumer_key:         '...',
  consumer_secret:      '...',
  access_token:         '...',
  access_token_secret:  '...',
  timeout_ms:           60*1000,  // optional HTTP request timeout to apply to all requests.
  strictSSL:            true,     // optional - requires SSL certificates to be valid.
})
Now we need to change the code inside of our module exports. With the base template that the serverless framework creates for us, we’re just returning a JSON object. We want to set up the code that handles the tweet we’re sending. (https://javascript.info/async-await & https://docs.aws.amazon.com/lambda/latest/dg/nodejs-handler.html) For now, let’s just tweet ‘hello world’. Here is the code for that:
module.exports.hello = async event => {

  const tweetResponse = await new Promise((resolve, reject) => {
    T.post('statuses/update', { status: 'hello world!' }, function(err, data, response) {
      console.log(data)
    })
  })

  return tweetResponse

};
The last thing we need to set up for our Lambda function is a way to trigger it.
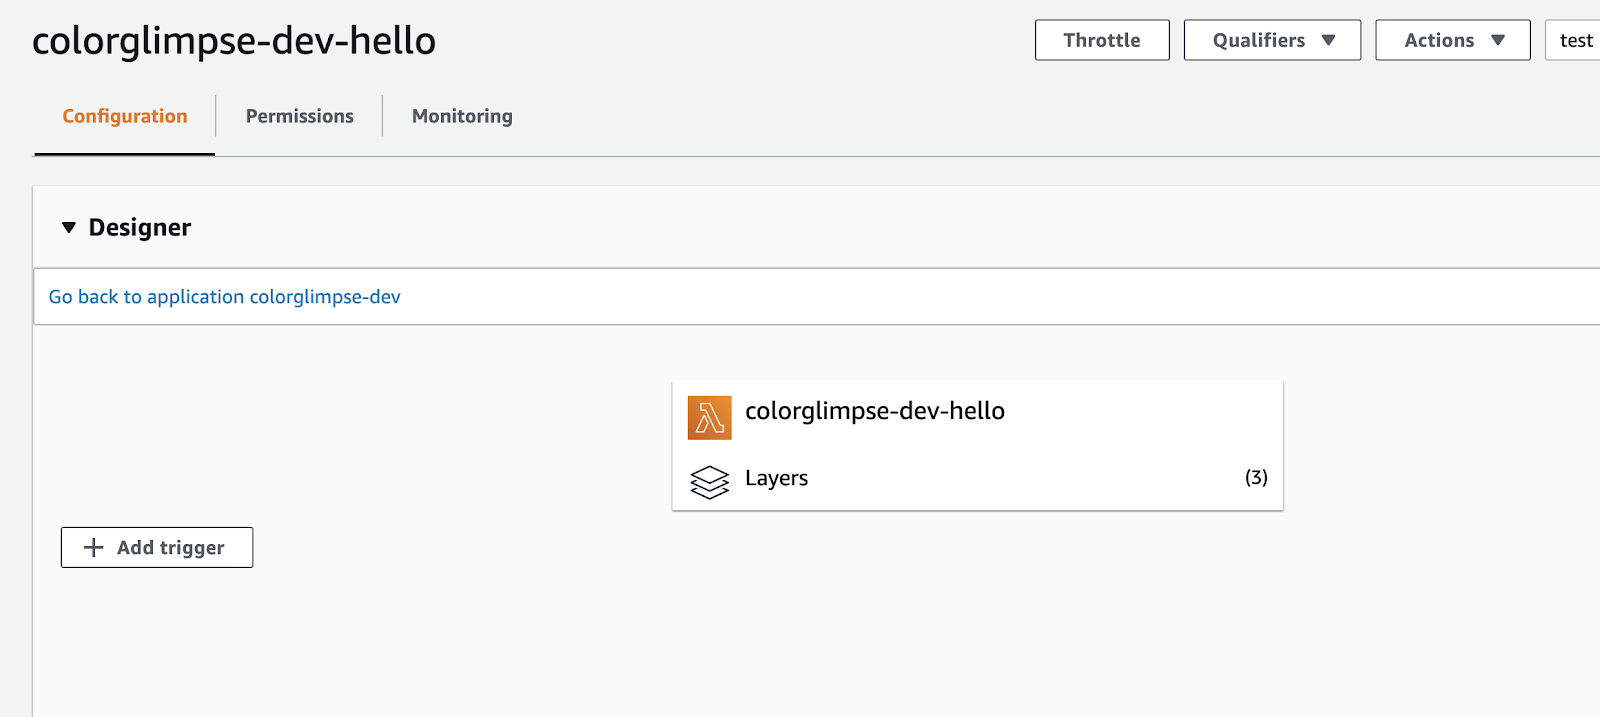
Clicking on ‘Add trigger’ will take us to the trigger configuration page.
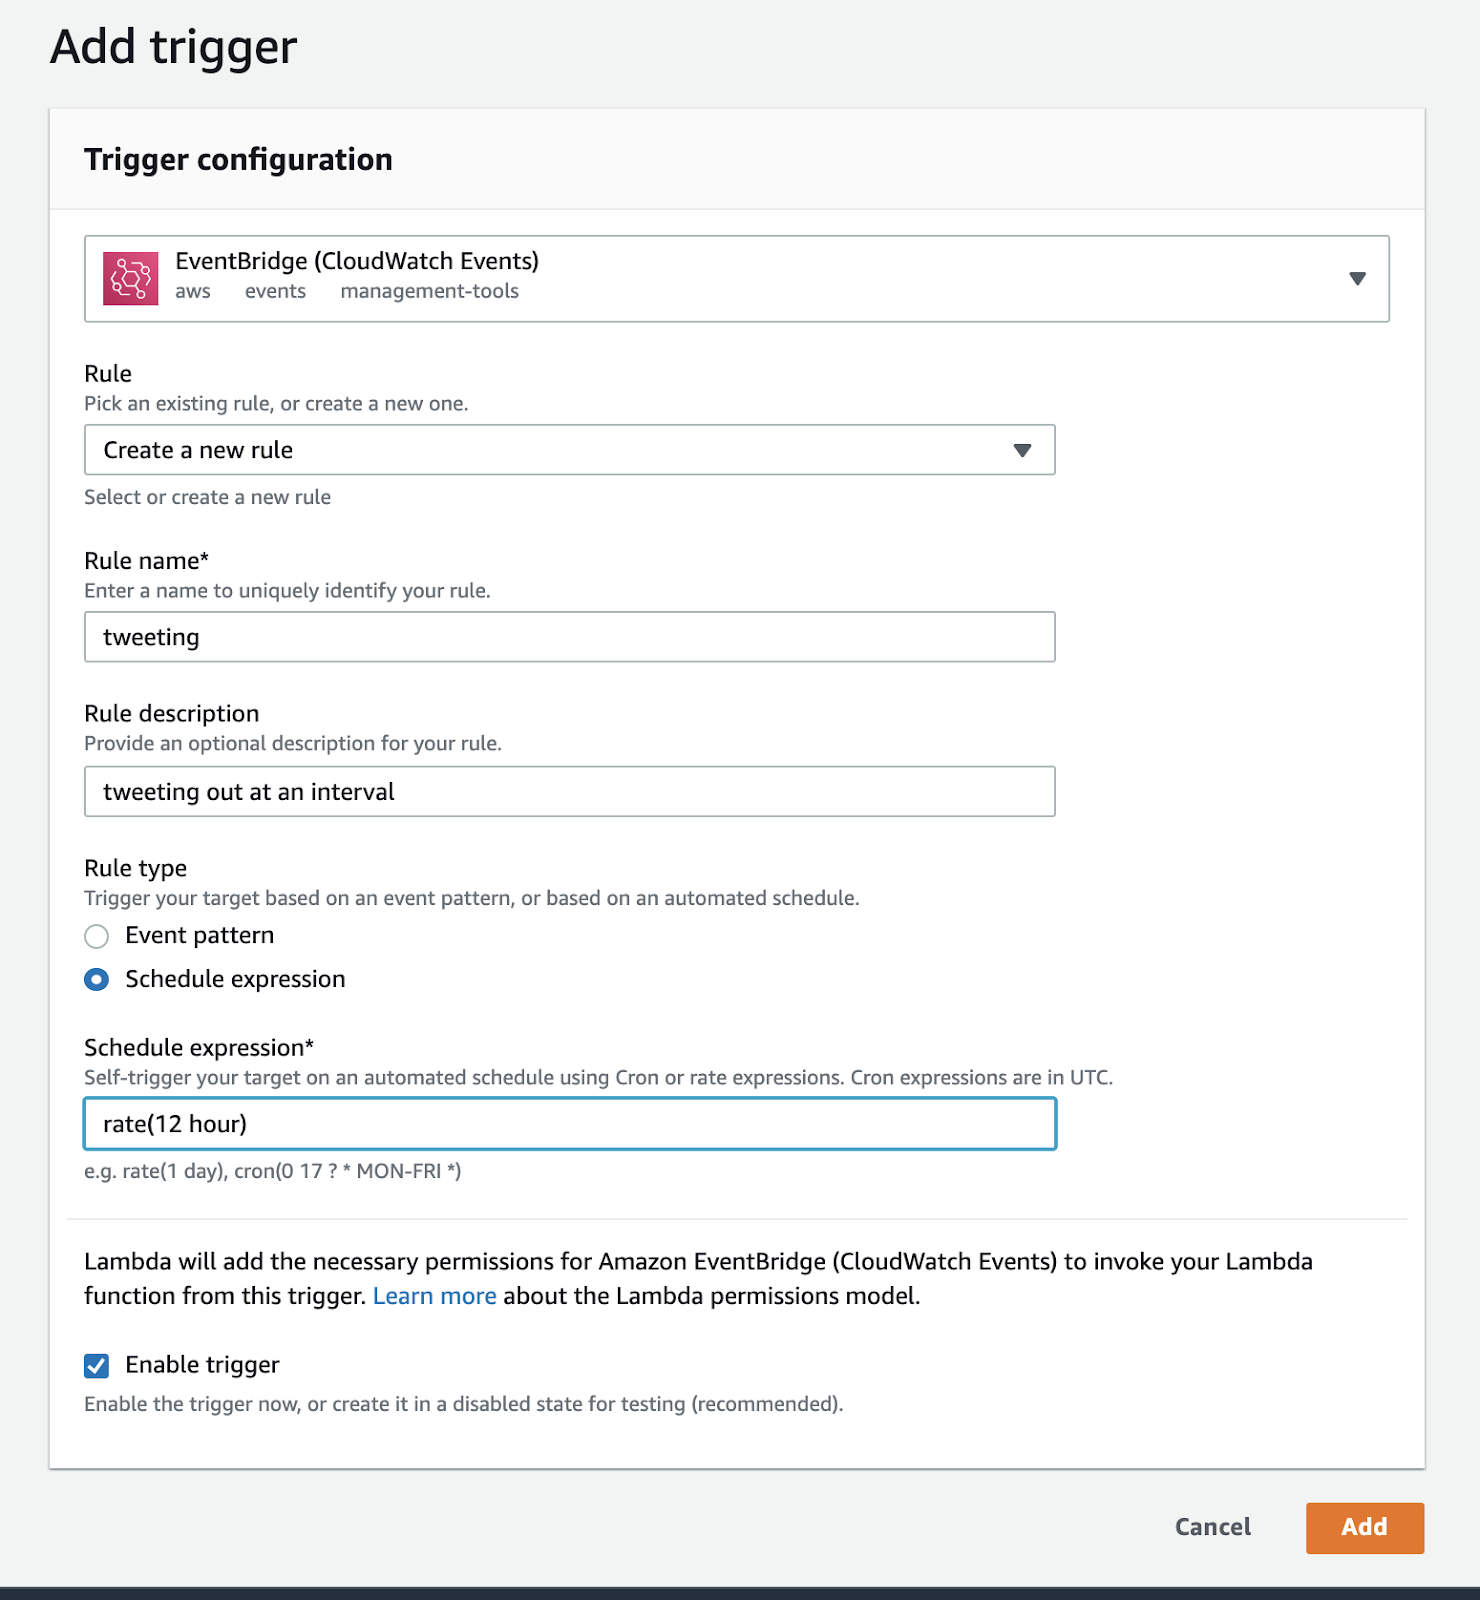
You can choose CloudWatch Events, and it will walk you through the process of setting up a rule. We created one called ‘tweeting’ which will run our function every 12 hours. You can set this up to run as frequently or infrequently as you want.
And that’s it! Now we have a working Twitter bot. I wanted to keep the example simple so that you can take the bot anywhere you want: you can create images and use Twit’s media upload ability, or play around with NLP models for mashing up words. For more resources on botmaking, check out https://botwiki.org/
Read Part 2: Monitoring a Serverless Application.
- Next: Part 2 - How to Monitor a Serverless Application
- Previous: New Blog