Rachel White
Technologist, Artist, Pretend-Cyborg
Rachel White is a technologist, artist, and pretend-cyborg who is currently a Technical Evangelist at Datadog. Previously at American Express, Microsoft, IBM, and Adobe. She is interested in new uses for old hardware, useless robots, VR/AR/MR, and bots. She has spoken internationally about Node.js, JavaScript, Creative Coding, IoT, Artificial Intelligence, NodeBots, and hardware. She's a previous artist in residence at Pioneer Works where she worked on a series that visualized what modern cybernetic augmentation could look like with todays hardware and special effects makeup. Her other interests include glitch art, 80s horror, and indie games. Her aesthetic is fog machines, laser lights, and broken VHS tapes.
She’s always looking for new opportunities to connect with people in areas related to open source, developer outreach & education, and new innovations in art and tech. She loves talking to other developers about their own personal projects, and helping new speakers workshop talk ideas. Or maybe you just want to say hi! If so, contact her at loveless [at] gmail [dot] com
Monitoring UX in Single Page Applications
serverlessreactnetlifyreal user monitoringA seamless user experience is the key to success for all modern web applications, but sometimes tracking user behavior is a bit difficult when you’re dealing with single page applications (SPAs). Let’s learn about Real User Monitoring (RUM) to get some insight into our users’ behavior so we can continue crafting the best journey.
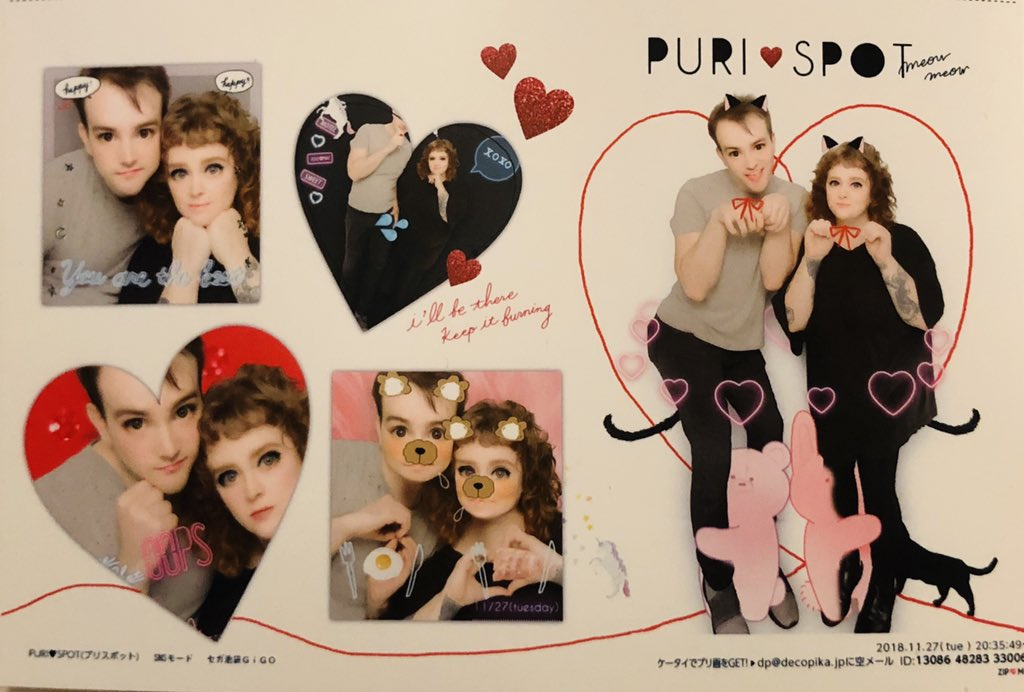
First we’re going to start with an application I built over the past year. One thing we all struggled with during the pandemic was connecting with our friends, and one of the things my friends and I love doing in normal circumstances is taking photobooth pictures. Specifically, Japanese style photo booths called purikura. In Japan, purikura (プリクラ) refers to a photo sticker booth or the product of such a photo booth. The name is a shortened form of the registered trademark Purinto Kurabu. The term derives from the English print club.
Purikura booths start off like any photo booth that you might see in the US, by taking your photos in a photo booth. Once you’re done, you move around to another side of the machine, where an interactive screen allows you to decorate your photos with filters, stickers, writing, and stamps. Finally, you move outside the booth to wait for your photos to be printed in sticker form, so you can share them with your friends.
![]()
I knew I wanted to build a web application that would enable myself and others to recreate that experience, but completely in the browser. Since I love a challenge, I decided to use only technologies that were new to me. That project is called Purrybooth.
Purrybooth is a React application utilizing WebAssembly for ultra fast image filtering, and HTML5 canvas for the photo decorating. It’s hosted on Netlify, so any time I push changes to my main GitHub repository, the build automatically kicks off and everything is generated and deployed and I don’t have to worry about a thing.
Let’s walk through the technical specifications so you can have an understanding of how this was built. I knew that I was going to be building a fairly simple React application, and that all of my components were going to be React hooks. It would be a single page application with no routing.
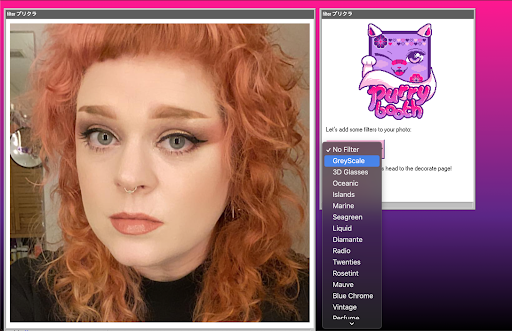
For the image, you are able to either use your webcam to take a photo, or upload a photo of your own before moving onto the filters. Image filtering is included in most image manipulation libraries. I had used ImageMagick before, but had a terrible time with it. I wanted to find a better way to do Instagram-like filtering. I came across Photon, a high performance image processing library written in Rust and can be compiled to WebAssembly, and there was already a React demo so it was easy to integrate. Once you choose the filter you want, you move onto the decoration stage.
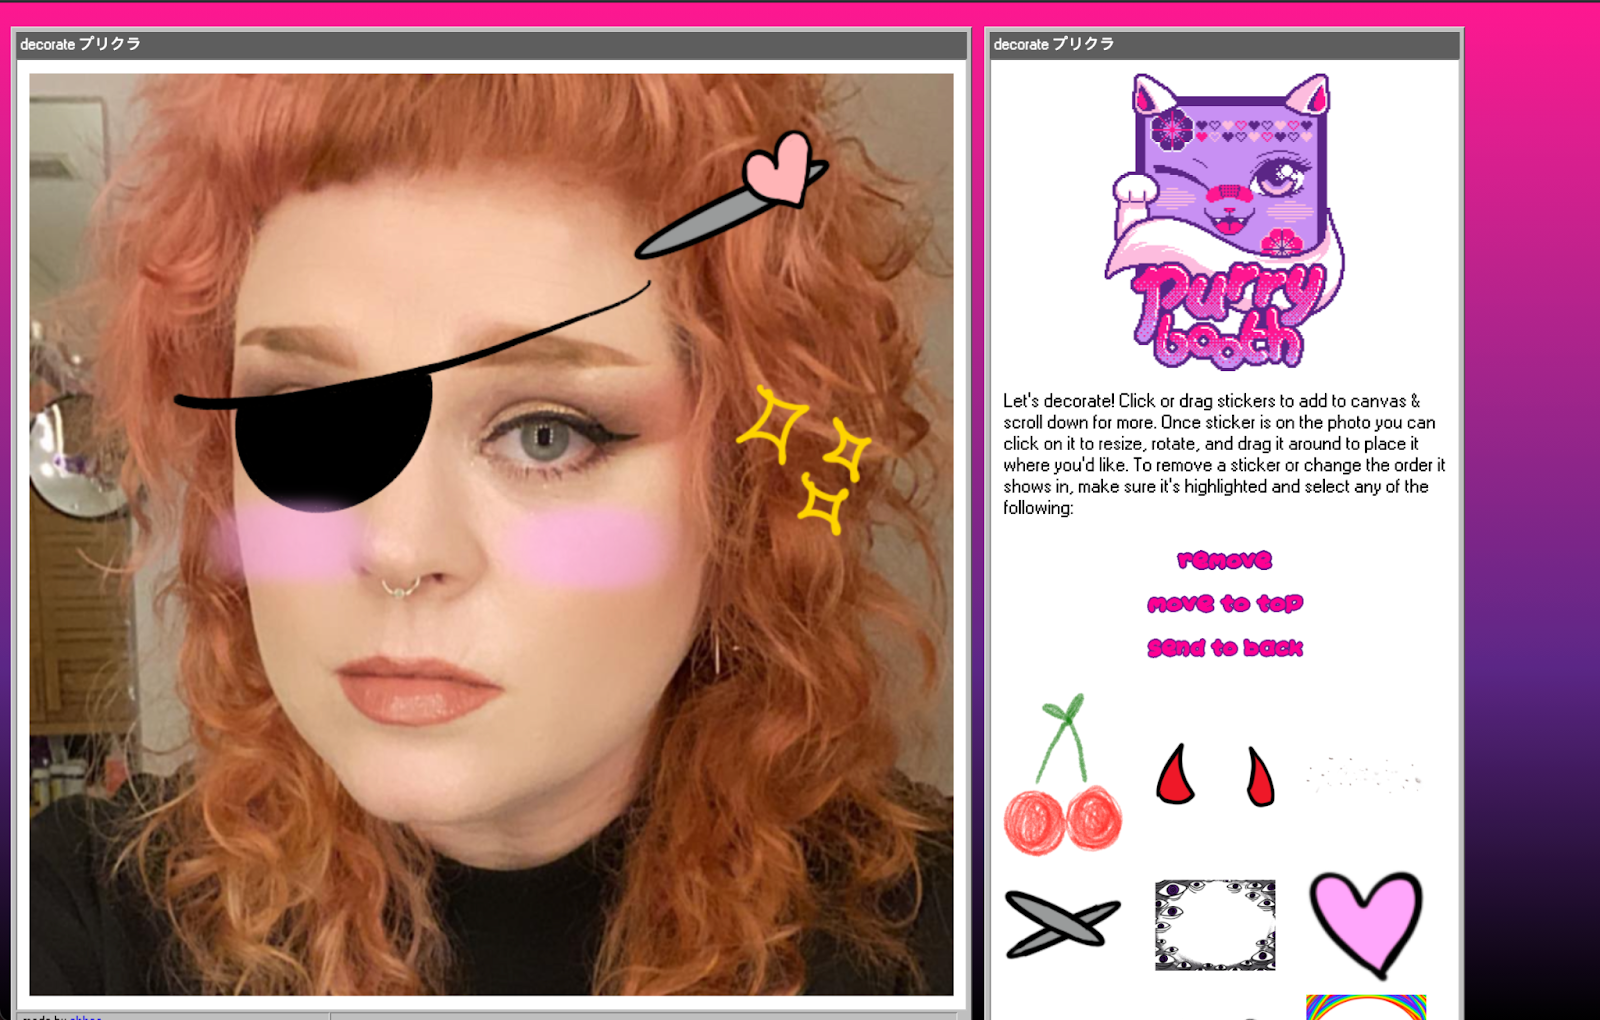
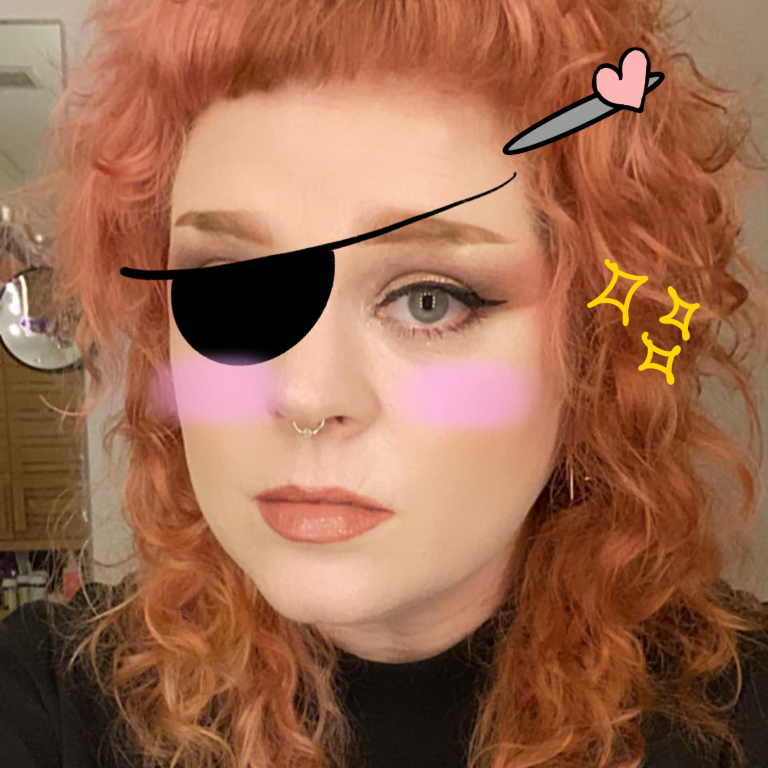
This was the trickiest part to solve! I knew I needed to use a canvas element, and I would be placing the filtered image as the background, but I also needed a way to add the stickers. I ended up using Fabric.js to achieve this, with some additional custom interactions I had to integrate—such as changing the z-index of the stickers and the capabilities for removing them. Once you’re done decorating with the stickers, you go to the final page where the canvas is rendered as an image, which you can save and share with your friends.
Now that I had a fully working app, as well as a base set of stickers and filters, I wanted a way to keep track of how my users were interacting with the photo booth. How could I know which stickers and filters were popular? I needed to have these kinds of insights in order to continue to make the best possible experience.
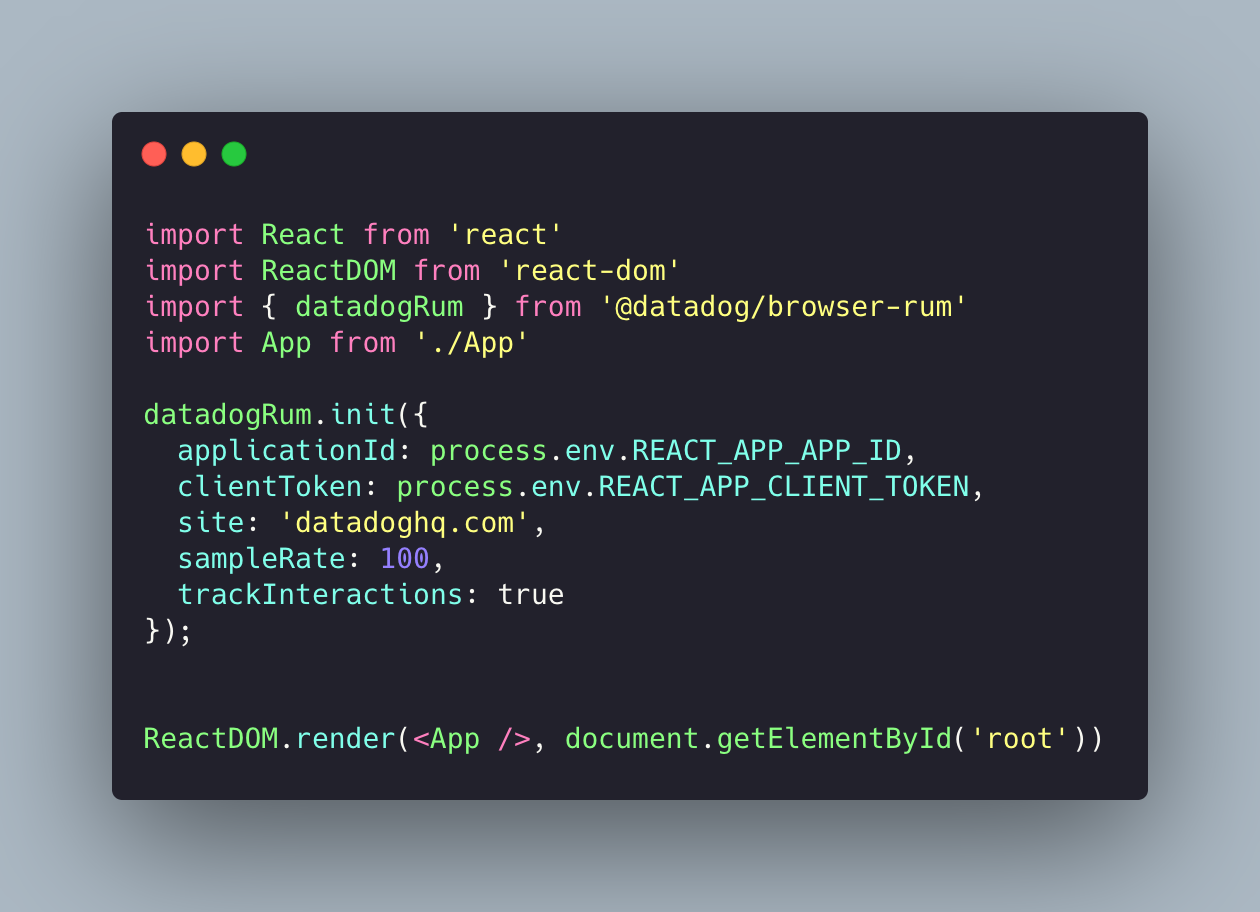
The next thing I did was integrate my app with Datadog’s Real User Monitoring. You only need a few lines of code in your main index.js file. Out of the box it gives you a lot of visibility into where your users are clicking, performance info, errors, and the usual analytics This was a good start, but It was missing something. Since I made the decision to create a routeless SPA, I only knew generally where users were clicking, but there was a way to improve on this data!
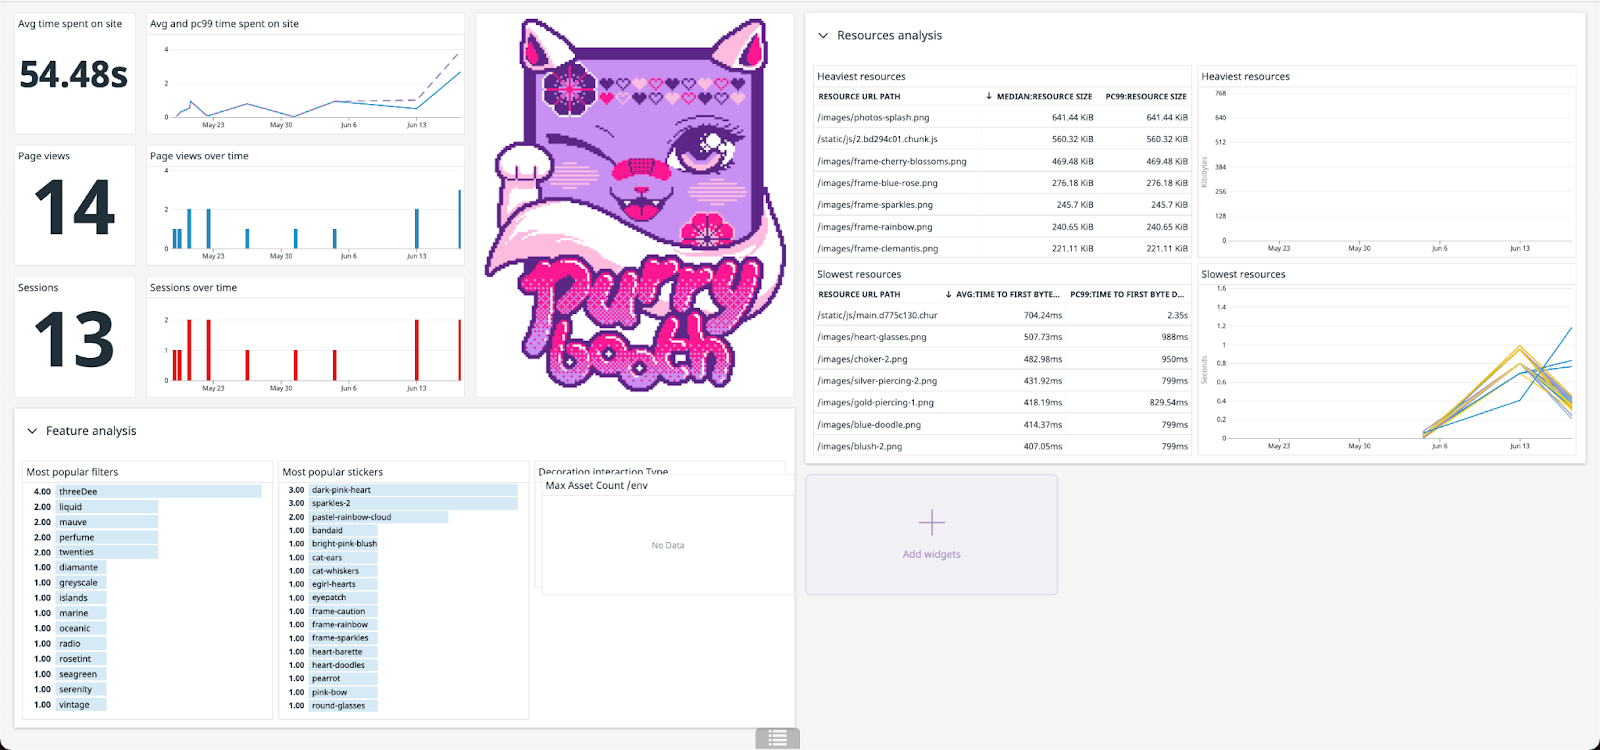
Custom User Actions allow you to collect additional events and data from your application. I wanted to be able to know what stickers were the most popular as well as what filters people were using. By adding Custom User Actions, I’m able to add or remove features depending on usage without having to A/B test, which really saved me a lot of time.
For more info on Purrybooth please try out the app for yourself at purrybooth.com, and check out the code on github.com/rachelnicole/purrybooth. For more info on Datadog Real User Monitoring, check out Datadog's RUM documentation.